Foscam, the world’s most trusted DIY brand sold in over 80 country’s
Wishlist (0)Foscam, the world’s most trusted DIY brand sold in over 80 country’s
How to setup your new Wi-Fi Foscam camera
Foscam has been designed as DIY product for the average home user. The simplest and easiest way is to use our app for your smart phone. The second way is to connect the camera to your router via a network cable and configure is using the app or our VMS software for windows or Mac, then move it to Wi-Fi.

Download the app from the play store for android or from the app store for IPhone
For cameras it’s called Foscam and looks like this.

For our range of older NVR’s (black in color) it’s called Foscam NVR and looks like this
PS, for our new range (white) you can just use the same app as for your cameras.

Download and open the app and create a account. You will receive a email confirming your email address, you need to click the confirm link in the email to activate your account or profile.
Log into the app using your account details.
It’s now time to add your new camera to the app.
· Make sure your camera is powered on is close to the Wi-Fi router, you can mount the camera later once it’s all setup.
· Make sure your smartphone is connected to the same Wi-Fi that you want to connect the camera to.
· Make sure you have Internet access from that Wi-Fi.
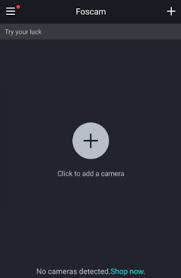
Click the + icon.

Depending on what you wish to add select from the following:
We will now scan the QR code on the base or side of the camera using the camera on your cell phone.
At the next screen choose Wi-Fi

You then get a screen where you must type in your Wi-Fi, you will then depending on your camera either be presented a QR code on your screen that you need to show to the camera, hold the screen of your cell phone towards the camera lens about a foot away from it. The camera will then “read” the QR code and it will connect its self to your Wi-Fi network.
The first time you try to view your cameras image it will ask you to setup a username and password, please write this down and store it somewhere safe.
Using a web browser and network cable.

Note: If this is the first time the camera is being logged into please follow the links below for the appropriate web browser before proceeding to install the proper web browser plugin.
For how to install the plug-in on Windows computer, please see here
For how to install the plug-in on MAC computer, please see here
Pre-paration:
1.(Skip this step if the camera is already configured and verified as connected to the network.) Apply power to the camera and connect it to the router via an ethernet cable.
2.Verify that the camera and the computer are connected to the same network.
Step 1: Download and install the Equipment Search Tool (skip this step of the software is already installed)
Official download site: http://www.foscam.com/download-center/software-tools.html
Note: Two tools are available one for Windows based computers and one for MacOS
Step 2: Run the Equipment Search Tool software on the computer.
Any Foscam cameras connected to the network will be displayed in the Window.
Note the IP Address of the camera that is to be configured.
Note: On a Windows based computer be sure to disable any virtual network drivers that may be installed. They will interfere with the Equipment Search Tool and prevent it from accessing the LAN. If you are unable to see any Foscam products check for these drivers under the Device Manager.
This type of driver is installed by Oracle Virtual Box.
Double clicking on the IP address of the camera will open the default web browser. On a Windows based computer be sure that Microsoft Edge, IE, Chrome or Firefox is used. On MacOS be sure to use Safari. Disable any Pop Up Blockers that may be running or it will interfere with the interface to the camera.
Step 3: If manually launching a web browser enter the IP address and port number for the camera.
From the example above to login to the FN3109H camera enter the following line.
http://192.168.15.23:88
Press the Enter key.
The login page for the camera should appear on the browser window.
Enter the username and password for the camera. If this is the first time the camera is being logged into the default username is Admin followed by a blank password. During a first-time login situation, you will be prompted to enter a new username and password for the camera. Be sure to notate this information somewhere for future reference.
Step 4: Continue to configure or use the camera as desired.